Navigating the Software as a Healthcare Provider
For provider users, the care coordination website hosts a majority of ChartRequest’s features. The sheer multitude of options may seem daunting at first glance, so let’s break it down.

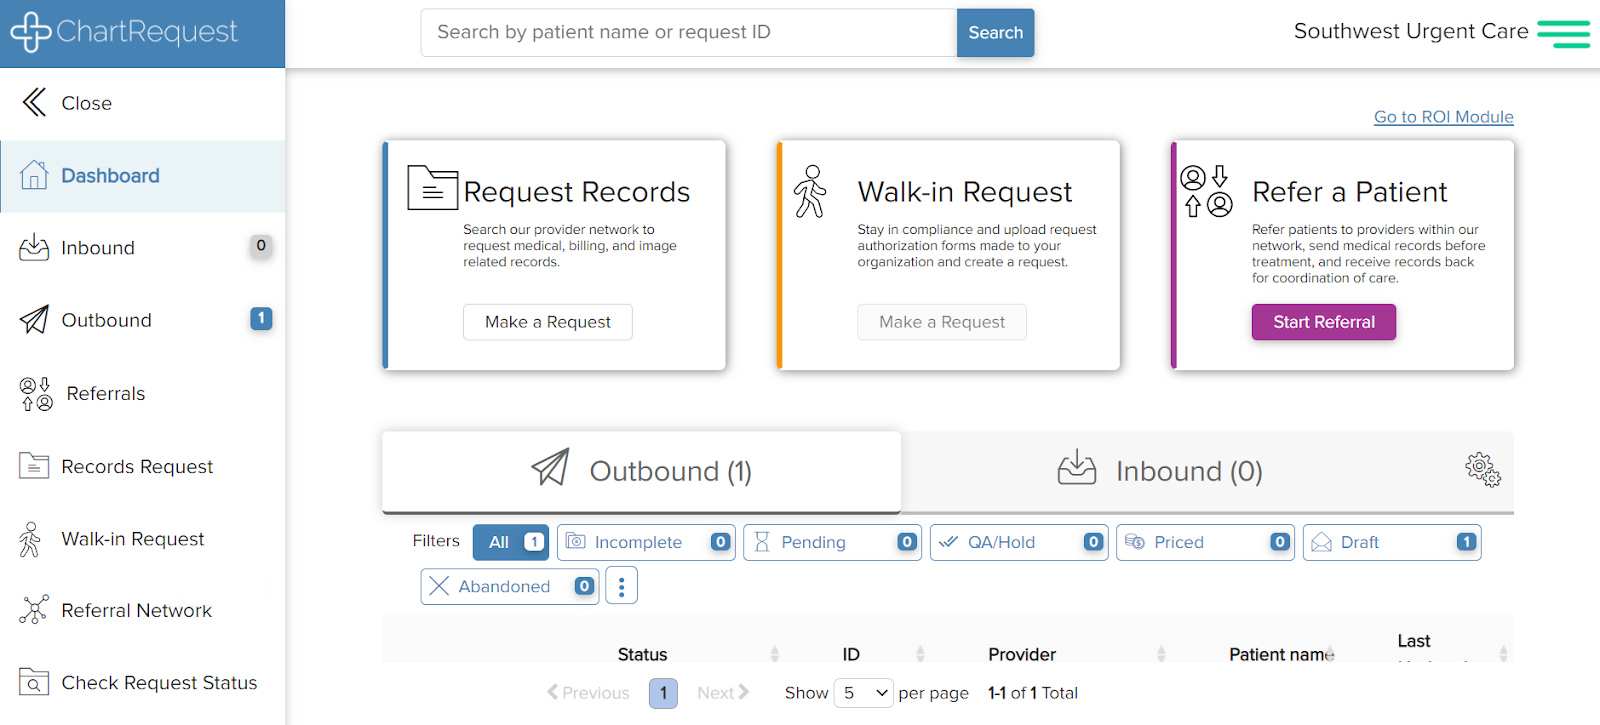
To the left of the page, you will see the navigation sidebar. The options are “Close,” “Dashboard,” “Inbound,” “Outbound,” “Referrals,” “Record Request,” “Walk-in Request,” “Referral Network,” and “Check Request Status.”
“Close” will simply minimize the navigation sidebar so only the images appear. While minimized, you can still click the images to navigate around the care coordination website.
“Dashboard” is the home page of the care coordination website. Here you can make a request for records, upload authorizations from walk-in requestors, and refer a patient to another provider.
Beneath these options, you can view your outbound and inbound requests and filter them by status. Click a request to review the details and make any edits or comments. You can also click the gears icon to select the information that appears for each request.
If you would prefer to use the legacy website, click “Go to ROI Module.” Please note that functions are limited in this version of the application.
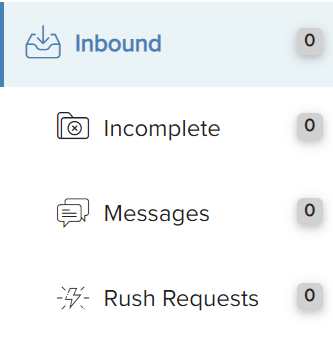
When you click “Inbound” on the sidebar, three additional options will appear: “Incomplete,” “Messages,” and “Rush Requests.” These options quickly filter the inbound requests to show those that need prompt attention.
“Incomplete” will show requests that still need to be retrieved.
“Messages” will show requests with messages from the requestor.
“Rush Requests” will show requests that were made with the rush service. These requests should take priority when retrieving records.
The “Outbound” option will bring you to a page similar to the “Outbound” section of the dashboard, but here you will also be able to make an “Advanced Search.”

The “Referrals” option will bring you to a page where you can create and review both incoming and outgoing patient referrals.

The “Records Request” option will open the same records request workflow as the “Request Records” option in the dashboard.

The “Walk-in Request” option will open the same walk-in management page as the “Walk-in Request option in the dashboard.

The “Referral Network” option will help you easily review and manage the other providers in your network.
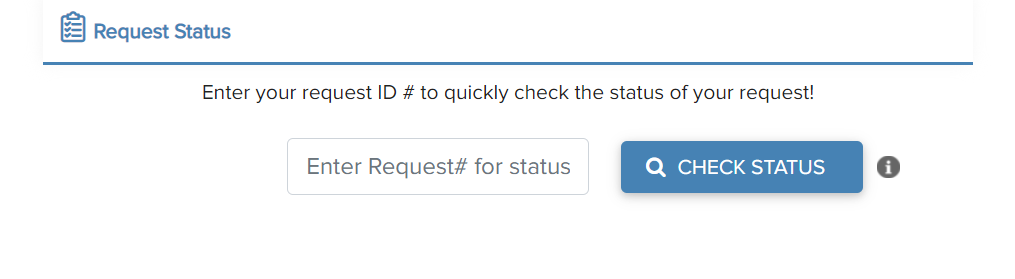
The “Check Request Status” option will allow you to search a record by ID number to check its status.

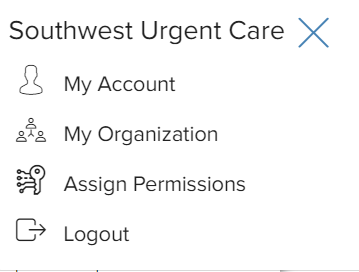
Click your facility’s name in the top right corner for four additional options: “My Account,” “My Organization,” “Assign Permissions,” and “Logout.”
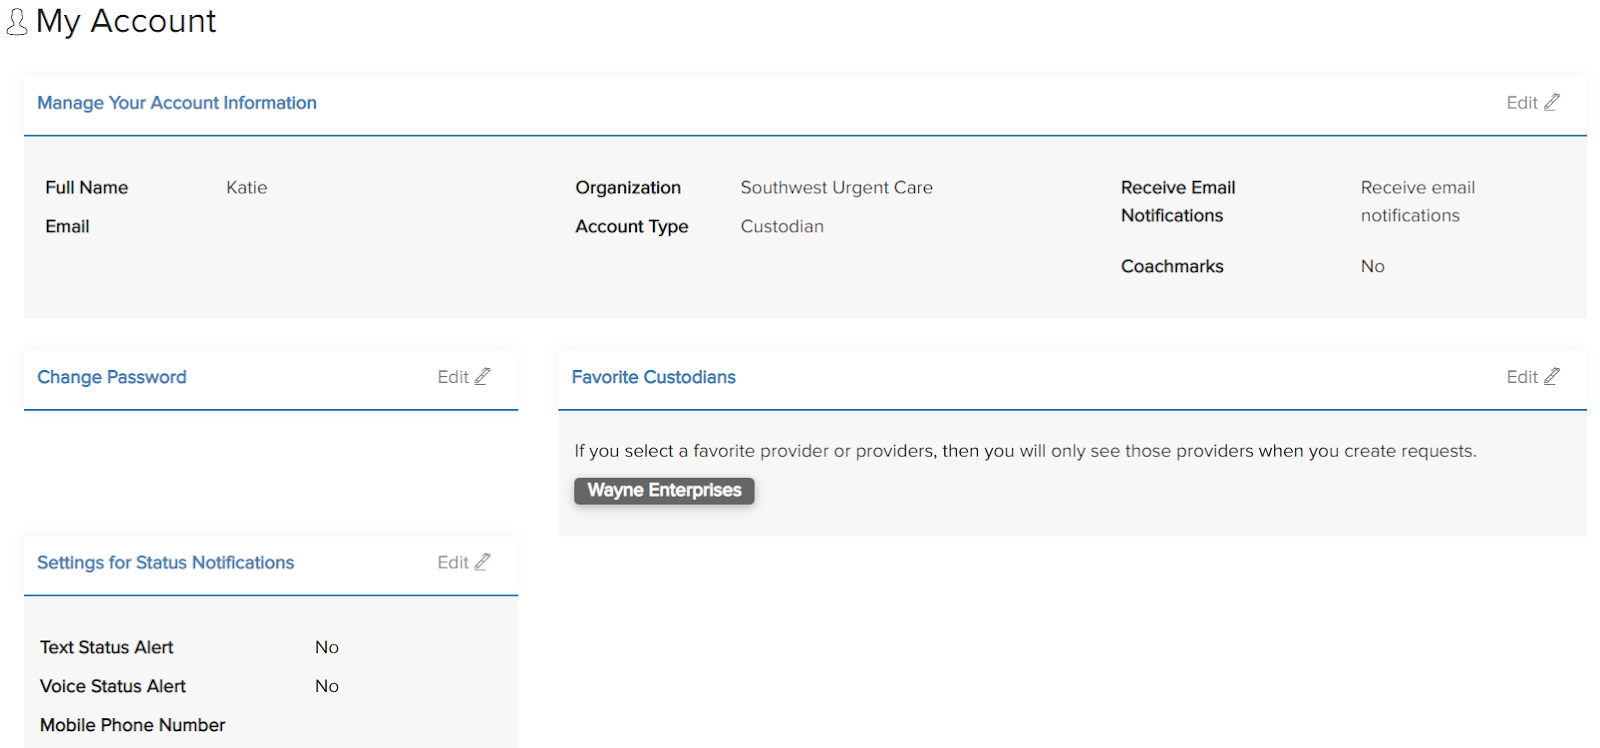
Click “My Account” to open your account settings. Here you can manage your account information such as email address and password, your favorite custodians, and your status notification settings by clicking “Edit” above the appropriate field.
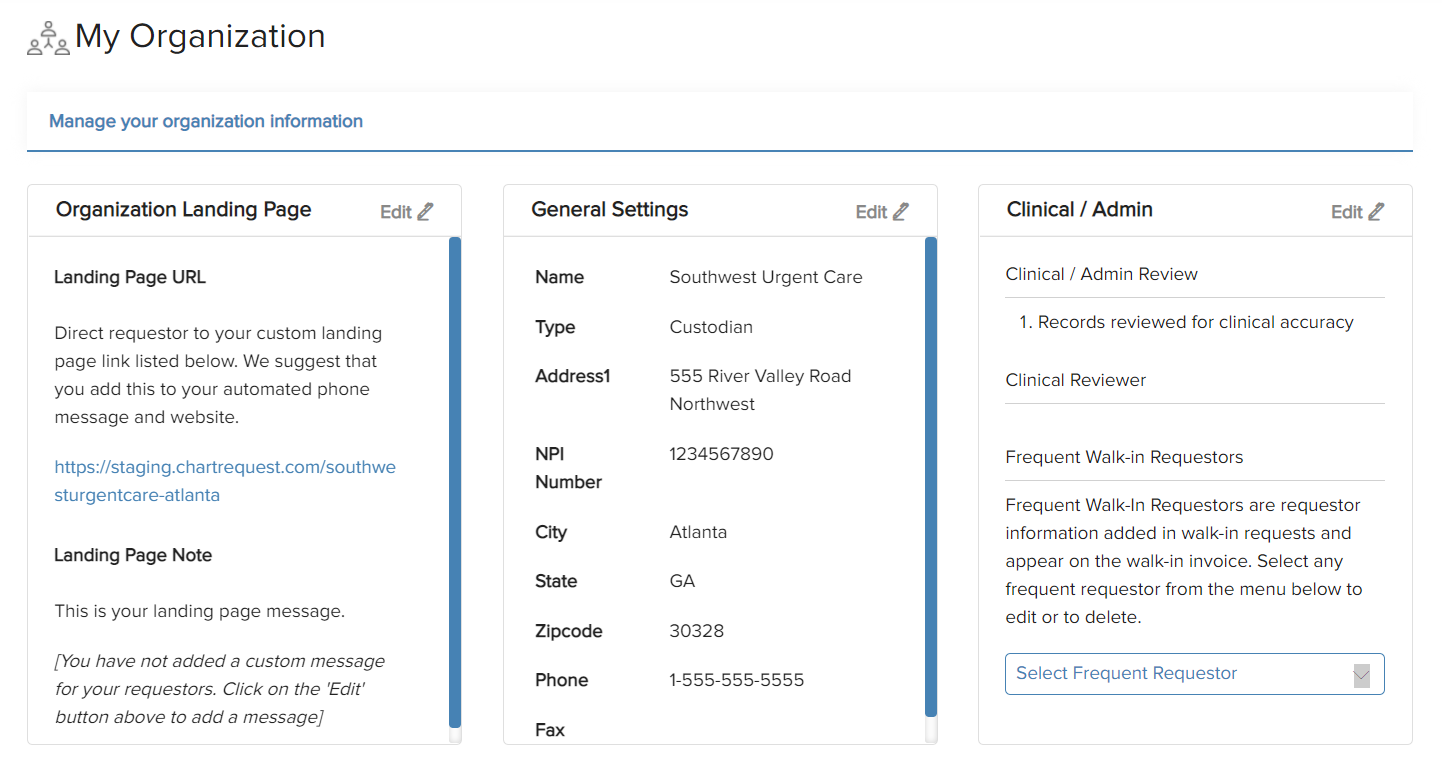
Click “My Organization” to manage your organization information such as your landing page link and your facility details. Under the “Clinical / Admin” settings, you can set up a review checklist, select a “Clinical Reviewer” within your organization, and select frequent walk-in requestors.
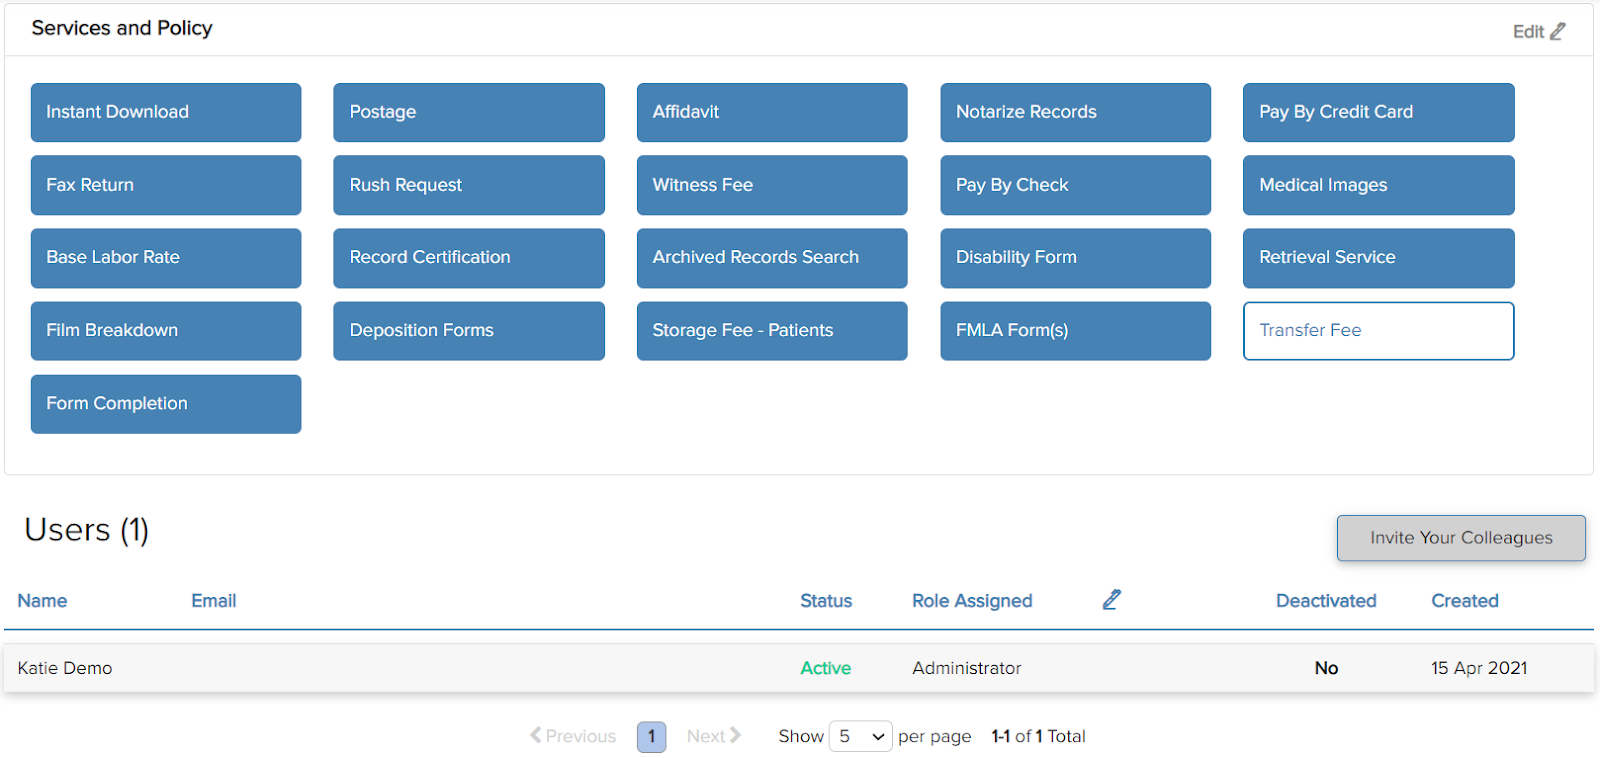
Here you can also select the additional services you offer and invite colleagues to join your organization.
Click “Assign Permissions” to select which types of users within your organization can utilize certain functions. You can hover over the blocks in the “Request Workflow” column for a description of each permission. Click an empty box to add a check, or a filled box to remove it.
