Creating a patient referral step-by-step
ChartRequest makes creating a new patient referral easy.
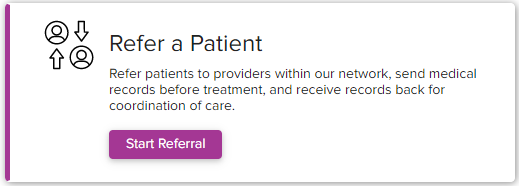
In the care coordination dashboard, navigate to “Refer a Patient” and click “Start Referral.” On the next screen, you’ll see a list of the information you need to create a new referral:
- Provider information
- Patient information and appointment preferences
- Medical, billing, and/or image records
Gather the information and click “Continue.” As you progress through the workflow, the steps you’ve completed will be highlighted in blue at the top of the screen. Click “Continue” at the bottom of each page to advance through the workflow.

Step 1: Enter the Patient’s Details
You’ll be prompted to enter the patient’s full name. If you’ve previously requested records for this patient, you can search for their name to autofill the information.

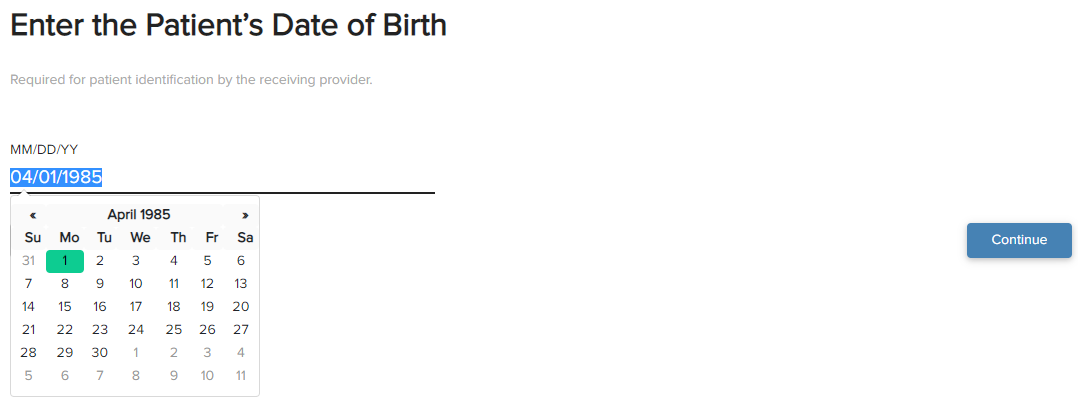
Enter the patient’s date of birth using the following format: MM/DD/YYYY. You can input the date manually, or you can click on the green line to bring up the calendar and select the right date.
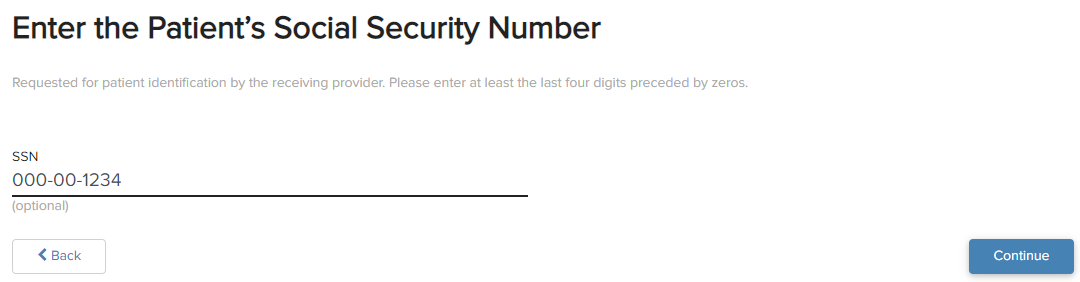
Enter the patient’s social security number. Providing the patient’s SSN isn’t a required step, but it helps with patient identification. Try to provide at least the last four digits of the patient’s SSN preceded by five zeros. If you don’t want to provide an SSN, you can skip this step by clicking on “Continue.”
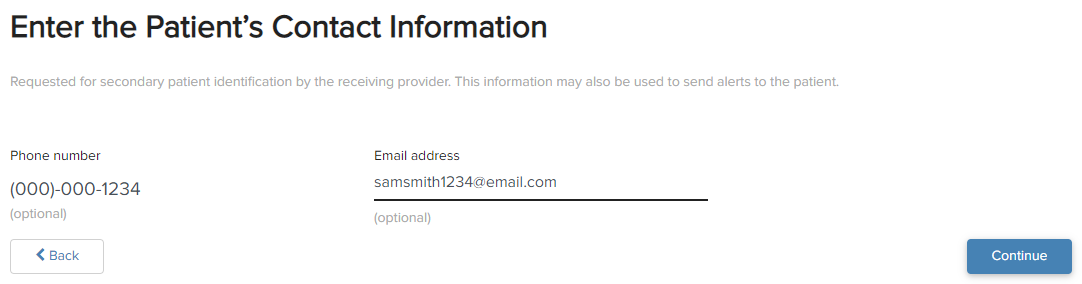
Enter the patient’s phone number and/or email address. This optional step also helps with patient identification. Additionally, we may use these contact details to send alerts to the patient.
Step 2: Select Provider
Search for the provider’s name and state, and click “Search.” Select the correct provider from the list, and their name will appear above the list next to “Selected Provider.”

You can also search using the map. Hold “ctrl” on your keyboard and scroll or click the “+” or “-” on the map to zoom in and out. You can also click and drag to move across the map. When you’ve found the provider you’re looking for, click to select them.
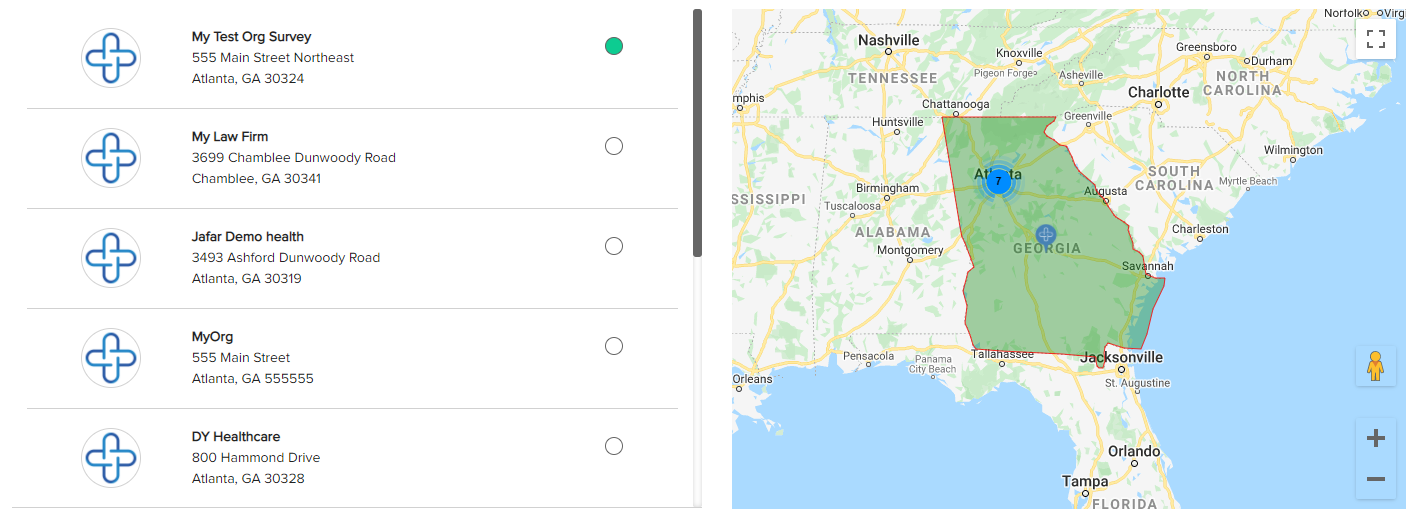
There are two filters you can apply with just a click: “Favorites” and “Nearby.” “Favorites” brings up a list of providers you’ve previously marked as favorites, while “Nearby” shows local providers.
If you can’t find the provider you’re looking for, click “Advanced Search” at the bottom of the page to pull up a search form. Fill out one or more fields to search for your provider.
If you still don’t see your provider, they might not be in our network yet. Click “Suggest Provider” to enter their details, and our team will then review your suggestion and add the provider to our network.
Step 3: Upload Files
You can skip this step if you don’t want to share any files.

To upload any files you’d like to share with the receiving provider, drag and drop a file onto the appropriate field, or click “browse” to select one from your computer. You can upload the following file types:
- Medical records
- Billing records
- Imaging records
- Forms
- Other documents
These files can have the following extensions:
- PDF: .pdf
- Sheet: .csv, .xls, or .xlsx
- Image: .png, .jpg, .tiff, or .bmp
- Media: .mov, .avi, or .mov
- Doc: .doc, .docx, .rtf, or .txt
Once you’ve uploaded one or more files, you can save the referral as a draft. If you want to come back to it later, you’ll be prompted to save the referral and exit. This will bring you back to the ChartRequest dashboard.
Step 4: Appointment Preferences
If the patient hasn’t indicated any preferences, you can skip this step.
Provide up to 3 times that the patient prefers for their appointment, and fill out the date in the format MM/DD/YYYY. You can also click on the calendar and select a date.
Select the time of day the patient prefers. There are three time periods available:
- Morning — 8:00 AM to 12:00 PM
- Afternoon — 12:00 PM to 4:00 PM
- Evening — 4:00 PM to 7:00 PM

Step 5: Request Return Records
Select the type(s) of records you’d like to receive from the referral partner after the patient’s referral appointment. There are three types of records you can request:
- Medical records
- Images
- Billing records
You can also add notes in the comment field to share additional information about the patient.
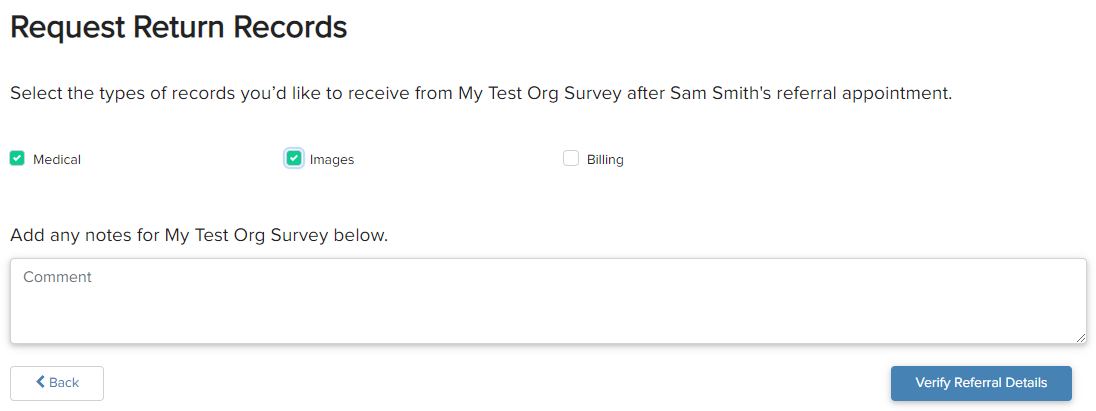
Click “Verify Referral Details” to review your referral before submitting it. You can edit the referral by clicking “Edit” in the appropriate section and saving the changes.
Click “Submit Referral” and confirm if you’re ready to send the referral to the selected provider. Click “Cancel” if you don’t want to move forward with the referral.
After submitting the referral, a confirmation screen with the referral ID will appear. Click the referral ID in the outbound tab of your referral dashboard to review it.
To check on the status of a referral, log in to the platform. In the dashboard, search for the referral ID you received when submitting the referral. The status will be listed next to the ID.
When the provider you’ve submitted a referral to receives it, the referral status will change from “Referred” to “Viewed.” You can abandon the referral and refer the patient to a different provider if they do not view the request in a timely fashion. In addition, all referrals will be automatically abandoned after 14 days in the “Referred” status.
The patient does not receive the referral. The provider will contact them by phone or email to schedule an appointment.